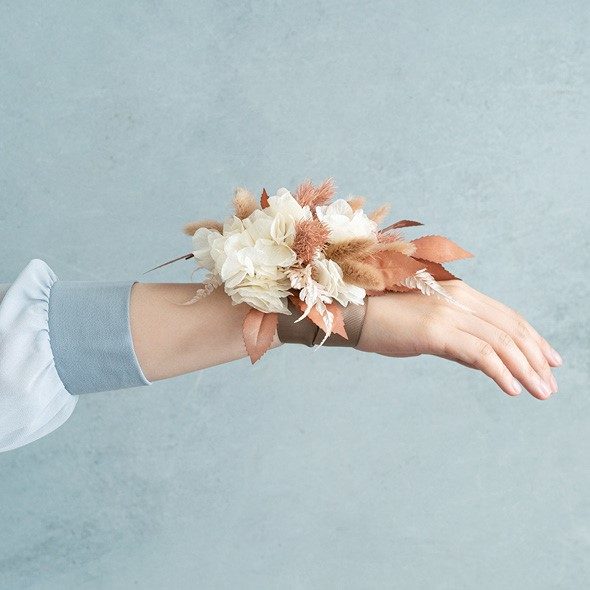
Corsages are a timeless accessory that can elevate any special occasion, whether it’s a wedding, prom, or formal event. These small, delicate floral pieces are worn as jewellery, typically on the wrist or pinned to clothing, adding a touch of elegance and beauty. While many opt to purchase pre-made corsages, making your own allows you to personalise the flowers and design, ensuring a unique and meaningful accessory. Here’s a step-by-step guide on how to create your own DIY corsage, making your special occasion even more memorable.
Step 1: Gather Your Materials
Before you start crafting your corsage, gather all the necessary materials. Here’s what you’ll need:
- Fresh flowers: Choose blooms that match the occasion, colour scheme, and your personal style. Popular choices include roses, orchids, lilies, carnations, and baby’s breath. Consider adding greenery like ferns or eucalyptus for texture.
- Floral wire and floral tape: These are essential for assembling the corsage securely and neatly.
- Corsage pin or wristband: Depending on whether you want to create a wrist corsage or a boutonniere-style pin, choose an appropriate pin or wristband.
- Scissors or floral cutters: Sharp scissors or cutters will help you trim the flowers to the right length.
- Ribbon: A beautiful ribbon can be used to wrap around the base of the corsage or tie it off for added elegance.
- Floral glue or hot glue gun: This is used to secure any extra details like embellishments or small flowers.
Step 2: Choose Your Flowers
Select the corsage flowers based on the event and your desired look. You may want to match your corsage to your dress, theme, or even the season. Here are some floral suggestions based on occasion:
- Wedding Corsages: Soft pastel colours like white, blush pink, or lavender work well for weddings. You might choose a single rose or a combination of small flowers like baby’s breath or a spray of white lilies.
- Prom Corsages: Bold, bright colours like red, purple, or gold are popular for prom corsages. You could go for a single large flower like a rose or an exotic bloom like an orchid for a modern, glamorous look.
- Seasonal Corsages: Use seasonal flowers for a fresh touch, like sunflowers in the summer or holly for winter events.
Step 3: Prepare the Flowers
Once you’ve selected your flowers, it’s time to prepare them. Trim the stems to about 3 to 4 inches in length, ensuring they are long enough to attach easily to your corsage base. Remove any leaves or petals that could get in the way of your design or spoil the overall appearance.
Step 4: Assemble the Corsage
Start by arranging your flowers in the desired shape. If you’re making a wrist corsage, you might want to group a few small flowers together, while for a traditional pinned corsage, a single flower might be the focal point.
- Positioning: Arrange the flowers in a cluster, making sure the blooms face outward. You can layer smaller flowers, like baby’s breath, around a central flower to create a fuller, more dramatic look.
- Securing with Floral Wire: Take a piece of floral wire and gently wrap it around the stems to hold the flowers in place. You can twist the wire at the base of the flowers to secure them.
- Wrap with Floral Tape: Once the flowers are wired together, wrap floral tape around the stems and wire to create a neat and secure base. The tape also helps conceal the wire and gives the corsage a polished look.
Step 5: Attach the Corsage to a Pin or Wristband
Now that your corsage is assembled, it’s time to attach it to a pin or wristband:
- For a wrist corsage: Use a ribbon to tie the corsage around the wristband or elastic. Secure the ribbon with floral tape or hot glue.
- For a pin-on corsage: Simply attach the corsage to a pin or brooch by securing the base with floral wire. Ensure the pin is sturdy and can be easily attached to clothing.
Step 6: Add Finishing Touches
To make your corsage truly special, consider adding a few final details. You could wrap the stem with a decorative ribbon, add small crystals or pearls for extra sparkle, or even include a charm that’s meaningful to you. You might also want to give your corsage a light spritz of floral spray to keep it fresh throughout the event.
Step 7: Wear and Enjoy
When you’re done making your corsage, wear it with pride and enjoy the praise! Your DIY corsage will not only look great with your outfit, but it will also show off your creativity and personal touch whether you wear it on your dress or wrap it around your wrist in a beautiful way.
Conclusion
Creating your own floral jewellery in the form of a DIY corsage is a fun and rewarding project. Not only does it allow you to customise the flowers and design to match your personal style and the event, but it also adds a meaningful, handmade element to your special day. With a little creativity and patience, you can craft a beautiful corsage that will be remembered long after the event ends.
Keep an eye for more latest news & updates on Qiuzziz!
